-
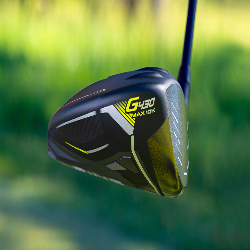
핑 G430 10k 드라이버 리뷰
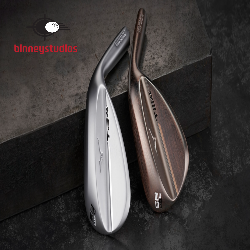
핑 G430 MAX 10K 드라이버의 중요성을 이해하려면 PING 드라이버의 발전 과정을 살펴보는 것이 중요합니다. PING은 골프 클럽 기술의 선두에 서서 최첨단 장비를 제공하기 위해 지속적으로 경계를 넓혀 왔습니다. PING Anser 드라이버 초기부터 최신 G 시리즈에 이르기까지 PING은 지속적으로 성능과 관용성을 우선시해 왔습니다. PING은 역사 전반에 걸쳐 골프 게임에 혁명을 가져온 주요 혁신을 도입해 왔습니다. 예를 들어, 1980년대 PING Eye2 드라이버에 주변 가중치를 도입하면 관용성이 향상되고 골퍼가 보다 일관된 샷을 달성할 수 있게 되었습니다. 나중에 PING은 조정 가능한 호젤과 다중 재료 구조를 도입하여 성능과 사용자…
-
치앙마이 골프 노스힐CC
소개 치앙마이 골프 리조트, 특히 치앙마이 노스힐 cc는 완벽한 목적지를 찾는 열성팬들에게 비교할 수 없는 골프 경험을 제공합니다. 잊지 못할 추억을 만들고 골프 실력을 향상시키기 위해서는 올바른 골프장을 선택하는 것이 중요합니다. 치앙마이 골프 리조트는 최고 수준의 시설, 도전적인 골프 코스, 탁월한 환대를 제공하여 기억에 남는 골프 휴가를 위한 이상적인 선택입니다. 치앙마이 골프 리조트: 개요 태국 북부의 아름다운 지역에 위치한 치앙마이 골프 리조트는 열정적인 플레이어에게 탁월한 골프 경험을 제공합니다. 그림 같은 풍경과 풍부한 문화 유산을 지닌 치앙마이는 전 세계 골프 애호가들에게 인기 있는 여행지입니다. 이번…
-
동남아 골프여행 best 5
소개 동남아시아의 골프 여행은 이 지역의 다양한 풍경과 세계적 수준의 골프 코스 덕분에 최근 몇 년간 큰 인기를 얻었습니다. 베트남 다낭의 깨끗한 해변부터 태국 방콕의 분주한 대도시까지, 골프 애호가들은 완벽한 휴가를 계획할 때 다양한 옵션을 선택할 수 있습니다. 동남아시아에서 골프 관광의 인기가 계속 높아지면서 새롭고 흥미로운 골프 목적지를 찾는 것이 그 어느 때보다 쉬워졌습니다. 베트남: 다낭과 나트랑 베트남은 잊을 수 없는 골프 경험을 제공하는 다낭과 나트랑과 함께 인기 있는 골프 여행지로 부상했습니다. 두 도시는 그림 같은 풍경과 우수한 골프장, 골퍼와 비골퍼 모두를 위한…
-
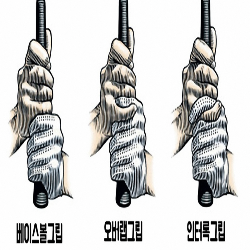
골프스윙 나에게 맞는 스윙으로 10타씩 줄여보자
나에게 맞는 스윙 찾기는 쉽지가 않습니다. 이글을 보고 맞는 스윙을 찾길 바랍니다. 골프스윙 기술에 대한 간략한 개요 골프 기술을 익히려면 다양한 스윙 기술과 그 독특한 특성을 이해해야 합니다. 각 골퍼는 고유한 신체적 특성, 기술 수준 및 선호도를 갖고 있으며 이는 가장 적합한 스윙 기술을 결정하는 데 중요한 역할을 합니다. 골퍼 개인에게 맞는 스윙 테크닉 선택의 중요성 적절한 스윙 기술을 선택하면 코스에서의 성능이 향상될 뿐만 아니라 부상 위험도 줄어듭니다. 다양한 스윙 스타일을 실험하고 부지런히 연습함으로써 골퍼는 자신의 기술을 다듬고 최적의 결과를 얻을 수…
-
자세 문제? 퍼터길이 정확성 일관성 큰영향
소개 적절한 퍼터 길이를 선택하는 것은 골프 게임을 향상시키는 데 중요한 측면입니다. 올바른 퍼터 길이는 그린에서의 일관성과 정확성에 큰 영향을 미칠 수 있습니다. 키, 자세, 개인 취향 등 다양한 요소가 각 골퍼의 이상적인 퍼터 길이에 영향을 미칩니다. 퍼터길이 지금 바로 재보기 퍼터길이 이해 골프에 있어서 완벽한 퍼터 길이를 찾는 것은 그린에서의 퍼포먼스에 중요한 역할을 합니다. 그렇다면 퍼터 길이가 왜 중요한가요? 즉, 이는 퍼팅 일관성과 정확성에 큰 영향을 미칩니다. 퍼터가 너무 길거나 짧으면 자세가 불편해지고 볼과의 접촉이 부적절하게 되어 결과적으로 퍼팅을 놓치고 점수가 높아질 수 있습니다.…
-
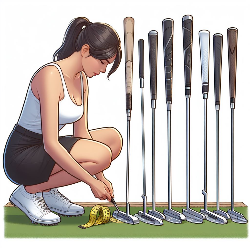
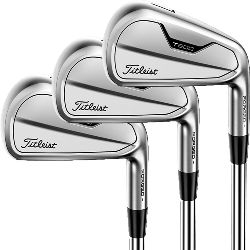
3퍼터 이제그만! 퍼터길이 재는법
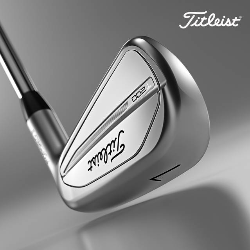
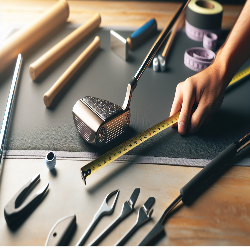
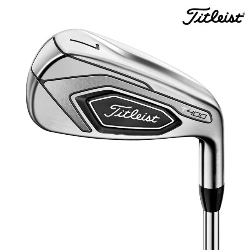
퍼터길이 재는법: 최적의 성능을 위한 퍼터 길이 측정 방법 최적의 골프 성능을 위해서는 퍼터 길이를 정확하게 측정하는 것이 필수적입니다. 잘 맞는 퍼터는 퍼팅의 정확성과 일관성을 크게 향상시켜 전반적인 게임 결과를 향상시킬 수 있습니다. 타이틀리스트 T200 아이언이 컴팩트한 헤드 디자인과 복합 소재 기술로 골프 성능을 향상시키는 것처럼, 스탠스, 그립 스타일, 신체 치수에 맞는 올바른 퍼터 길이를 갖는 것이 그린에서의 성공에 매우 중요합니다. 이 가이드에서는 퍼터 길이의 중요성을 살펴보고 이를 정확하게 측정하기 위한 단계별 프로세스를 제공합니다. 퍼터길이 이해 골프의 세계에서 퍼터 길이, 즉 퍼터 길이는…
-
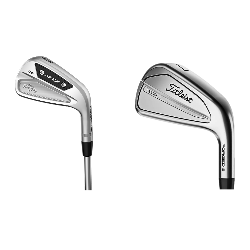
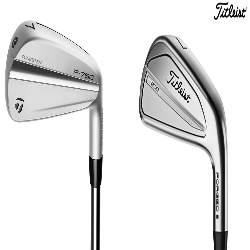
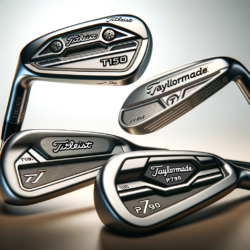
타이틀리스트 T150 테일러메이트 P790 비교
소개 골프 아이언의 경우 타이틀리스트 T150과 테일러메이드 P790은 중급 및 고급 골퍼들 사이에서 인기 있는 두 가지 옵션입니다. 두 아이언 모두 인상적인 기능과 장점을 자랑하므로 그린에서의 기술을 향상시키려는 사람들에게 이상적인 선택이 됩니다. 이 비교는 이러한 아이언의 주요 측면을 강조하고 골프 애호가가 T150과 P790 중에서 선택할 때 현명한 결정을 내릴 수 있도록 돕는 것을 목표로 합니다. 타이틀리스트 T150 아이언 Titleist T150 아이언에는 경쟁 제품 중에서 눈에 띄는 몇 가지 주요 기능이 있습니다. T150 아이언은 무엇보다 컴팩트한 헤드 디자인을 선보이며 세련되고 세련된 외관으로 많은 골퍼들이…
-
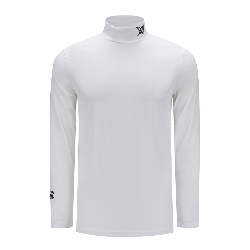
어뉴골프웨어 베스트 셀러 레이어드 하이넥 셔츠
어뉴골프웨어 베스트 셀러 레이어드 하이넥 티셔츠 골프 매니아로서 올바른 복장을 선택하는 것은 코스에서의 스타일과 편안함 모두에 중요합니다. 어뉴골프웨어는 패션과 기능성의 완벽한 조화를 제공하도록 디자인된 베스트 셀러인 레이어드 하이넥 티셔츠를 선보입니다. 이 혁신적인 골프웨어는 독특하고 편안하며 세련된 옵션을 제공하여 골프 경험을 향상시킵니다. 어뉴 공식 홈페이지 방문 소개 모든 골프 애호가를 위한 편안함과 스타일이 조화를 이루는어뉴골프웨어의 세계에 오신 것을 환영합니다. 오늘 기사에서는 MCOLDFABRICHIGHNECKT-SHIRT_WH로 알려진어뉴골프웨어의 베스트셀러 레이어드 하이넥 티셔츠에 대해 논의하겠습니다. 이 세련되고 기능적인 골프웨어는 모든 골퍼의 옷장에 꼭 필요한 아이템으로, 골프 코스에서 최고의 모습과 느낌을 선사합니다.…
-
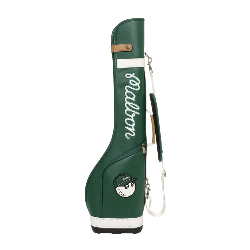
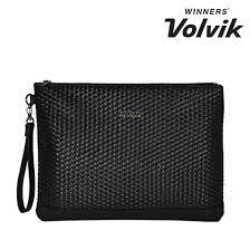
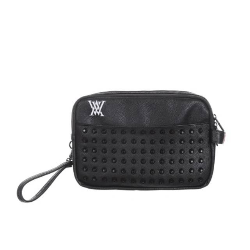
베스트 셀러 어뉴 골프 파우치
어뉴 골프 파우치: 필수 골프 액세서리에 대한 자세한 개요 골프 액세서리는 매니아와 전문가 모두에게 게임 경험을 향상시키는 데 중요한 역할을 합니다. 이러한 필수 액세서리 중 하나는 골퍼들이 코스에서 정리된 상태를 유지할 수 있도록 설계된 Annew 골프 파우치입니다. 이 다용도 파우치는 스타일리시한 기능성과 실용성을 제공하여 모든 골퍼 컬렉션에 없어서는 안 될 아이템입니다. 어뉴 골프 파우치 구매방법 귀하의 골프 액세서리 컬렉션에 필수적인 Annew 골프 파우치를 추가하려는 경우 다음의 간단한 단계를 따르십시오. 먼저, 앤뉴 골프파우치의 가격은 99,000원으로 골프 마니아와 프로 모두에게 합리적인 투자가 될 것이다. 이 다용도…
-
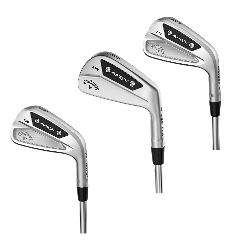
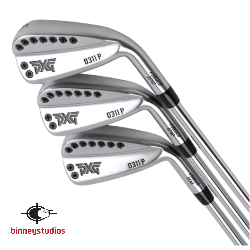
PXG아이언 Gen4 0311P 리뷰
PXG아이언 Gen4 0311P 리뷰 가치가 있나요? PXG아이언 Gen4 0311P는 0311T 및 0311XP 모델도 포함하는 새로운 0311 시리즈의 일부로 골프계에서 큰 화제를 불러일으켰습니다. 세련된 디자인과 첨단 기술을 갖춘 이 아이언은 거리, 샷 컨트롤, 관용성 사이의 이상적인 균형을 달성할 것을 약속합니다. 골프 애호가와 전문가 모두가 이 최신 제품의 장점에 대해 토론하는 동안, 우리의 목표는 PXG아이언 Gen4 0311P를 조사하고 실제로 과대광고에 부응하는지 판단하는 것입니다. PXG아이언 Gen4 0311P 개요 PXG아이언 Gen4 0311P는 세련되고 세련된 디자인을 자랑하며 시각적으로 매력적일 뿐만 아니라 0311T 모델과 유사점도 공유합니다. 새틴 마감은 미적인…